
A sandwich maker is an advantageous kitchen appliance. It is a simple method for making perfectly toasted sandwiches. Maintaining the sandwich maker’s cleanliness is the key to its continued superior performance. Unnervingly, cleaning a sandwich maker with non-removable plates is a necessity. You must ensure that you are only cleaning the plates of the sandwich maker and not flooding it with water.
Here are some helpful suggestions for cleaning your sandwich maker:
This is one of the first things you should consider when cleaning your sandwich maker. Do not attempt to clean your appliance with chemicals, scrubbers, or scrubbing pads. Using these methods to clean non-stick plates would result in significant damage. If you have compromised the non-stick plates in some way, every sandwich you make will stick to the surface.
How To Clean A Sandwich Maker In 4 Simple Steps
A sandwich maker is a convenient way to enjoy hot, perfectly toasted sandwiches at home, but maintaining its cleanliness is essential to ensuring its continued performance. Simply remove the plates from the appliance and wash them in warm, soapy water to complete the cleanup. However, cleaning plates that cannot be removed requires a bit more patience. Carefully clean the plates with a slightly soapy dishrag or sponge, taking care not to flood the sandwich maker with water.
Step 1: Turn It Off and Unplug It
Before you begin cleaning a panini press, ensure that it is completely turned off and unplugged.
Start cleaning it while it is unplugged and still warm, but not hot. This will aid in removing any crumbs or oily residue before they can adhere.
Step 2: Take Out the Removable Plates
Remove the plates from the oven using oven mitts and place them in the sink for washing. As soaking the plates could damage the non-stick coating, avoid doing so.
If the dishes are dishwasher-safe, you may now place them in the dishwasher. Before placing plates in the dishwasher, check the instruction manual to see if they are dishwasher-safe, as doing so could damage them.
Step 3: Wipe Down the Plates with a Sponge or Cloth
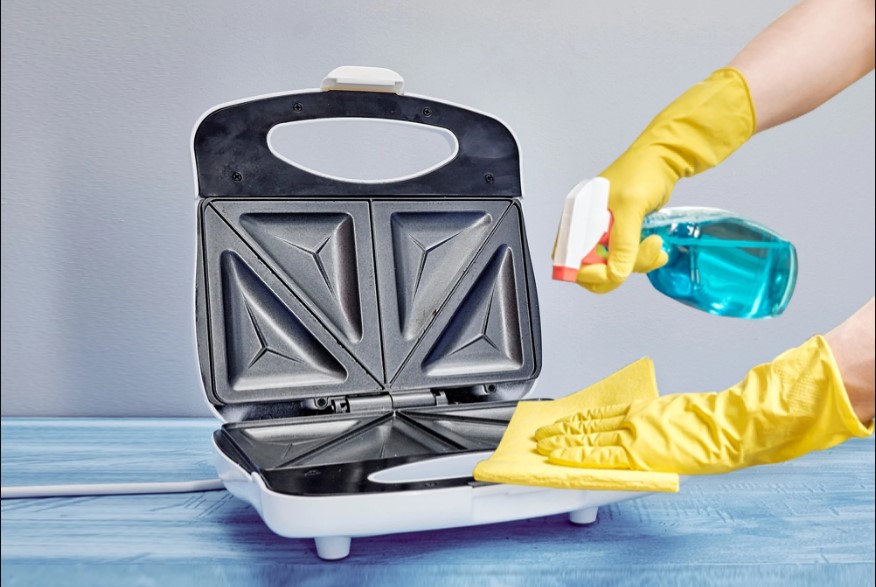
Take a hot, soapy cloth or sponge, but not one that is too wet or soapy, and gently wipe the plates to remove most food particles. Then, wipe the surface a second time with vigor and rub any remaining food residue with care. Keep in mind the grooves on the plates (if there are grooves) where food can become lodged, and clean around each groove.
Step 4: Are you still battling residue between the grooves?
If you are still having trouble removing the residue from between the grooves, then try this helpful tip: Wrap a chopstick (or the round end of a butter knife) in a damp dishcloth, and then attempt to loosen any remaining grime by cleaning between the grooves again.
How To Clean Removable Sandwich Maker Plates
Before cleaning, unplug the sandwich maker and allow the plates to cool. Take the plates out of the sandwich maker. Throw away any loose crumbs. To avoid scratching the plates, remove any stuck-on food with your fingernail or a plastic utensil, like a spatula.
- Submerge the plates in warm, soapy water and scrub them with a dishrag or sponge. Allow the plates to soak for a few minutes to loosen food particles.
- Rinse the dishes with clean water and allow them to dry.
- Using a dry, soft cloth or paper towel, clean the exterior of the sandwich maker.
How To Clean Non-Removable Sandwich Maker Plates
Before cleaning, unplug the sandwich maker and allow the plates to cool. Throw away any loose crumbs. To avoid scratching the plates, remove any stuck-on food with your fingernail or a plastic utensil, like a spatula.
- Squeeze excess water from a soapy sponge or dish rag and wash the plates with care. For stubbornly adhered food, cover plates with damp, slightly soapy paper towels and let sit for a few minutes. You can also pour a small amount of olive or vegetable oil over sticky foods and let them sit for a few minutes to make removal easier.
- Wipe the plates clean with a damp cloth or paper towel, then allow them to air dry.
- Using a dry, soft cloth or paper towel, clean the exterior of the sandwich maker.
Tips On Cleaning Sandwich Maker
The sandwich maker is straightforward to clean.
To easily remove stains from the sandwich maker’s plates, first clean them with a warm, slightly soapy cloth. The food that is adhered to the plates can be removed by gently scrubbing them with a cloth.
Finally, wipe the surface with a dry cloth.
Tips
- Instead of the harsh dishwasher, use a sponge or cloth to clean the sandwich maker.
- Never submerge your appliance in water, as doing so can cause electrical circuit damage.
Warnings Regarding Sandwich Maker Cleaning
While cleaning your sandwich maker, there are a few things you should NOT do. Here is a list of precautions to observe when cleaning a sandwich maker:
- Never place a sandwich maker in water or a dishwasher. The water will cause electrical circuit damage.
- Before cleaning it, ensure that it is unplugged and barely warm. Otherwise, it can result in severe injury.
- Use neither scrubs nor metal wire.
Useful Tips for Sandwich Makers and Panini Presses
Before cleaning your sandwich maker, it is standard practice to double-check the manufacturer’s instructions.
- Apply a small amount of olive oil, butter, or margarine to the bread’s exterior to prevent it from sticking to the sandwich maker. Or spray the plates with non-stick cooking spray. (This will also produce a crust that is slightly crispier and more golden-brown!)
- If stubborn residue persists after attempting the steps above, soak a paper towel in soapy water, let it sit on the plates for 10 minutes, and then try wiping them down again. This will eliminate any lingering residue.
- To reduce the amount of cleaning required, ensure that the toaster is fully preheated before placing your sandwich on it.
Maintaining your sandwich maker in good condition
In addition to cleaning your toaster after every use, there are additional things you can do to extend its lifespan.
- These metal objects, such as a knife or spatula, could scratch the cooking surface and damage the non-stick coating if used on the cooking plates.
- Do not use harsh abrasive cleaners; warm soapy water is sufficient.
- To prevent the bread or cheese from burning and sticking to the plates, ensure that you butter your toasties prior to toasting.
- You should also periodically reapply a non-stick coating. Using a paper towel or pastry brush, apply a thin layer of vegetable oil to the cooking plates to achieve this. This must be performed every 10 to 15 uses. This will protect the cooking surfaces, prevent your toast from sticking, and make cleanup a breeze.
How To Clean Sandwich Maker - FAQs
A damp cloth can be used to clean the exterior of your sandwich or panini maker. Following these steps, a damp cloth or soft sponge can be used to clean the plates: Note: Do not submerge the appliance in water.
- Before replacing the baking plates, unplug the sandwich maker and allow it to cool.
- Removing The Baking Plates: To remove the bottom baking plate, move the locks C3 toward the handle A3 and then pull it out. Similarly, release and remove the upper plate.
They will be prevented from doing so in the future. The top two reasons why bread sticks to a sandwich toaster are as follows: Both the bread and the toaster were not lubricated. The toaster was not thoroughly cleaned.
Using a water-and-baking-soda solution is the simplest and most common way to clean a sandwich press without risking damage to its nonstick surface. This method leaves the sandwich press squeaky clean without causing any harm to the nonstick coating. Simply combine approximately two teaspoons of baking soda with a half cup of warm water.
Cut two pieces of baking paper to the same dimensions as your sandwich maker’s plates, and you’re all set! Simply place one piece under the sandwich and another on top, then press.
First, the exterior must be buttered so that a golden, crisp crust forms. Second, it must be compressed using a hinged lid, a cast-iron weight, or an appropriate kitchen tool, so that the bread and filling are welded together.
This month’s issue of Cook’s Illustrated featured an excellent tip for making hot sandwiches in a panini press without making a mess. Before placing your sandwiches in the press, wrap them in parchment paper; this will create a little envelope for messy cheeses and oils and keep them off the machine.
If you use warm, soapy water, the dishes may become soiled in the dishwasher, or you can manually wash them. To ensure that the plates do not fall off the unit, you must wipe them off with a sponge dampened with soapy water and then rinse the unit with a sponge dampened with warm water.
Before washing the plate, wipe it with a clean, soft, damp cloth and a kitchen towel. Immediately after preparing the food, sauté it in liquid cooking oil. This recipe can be used to protect and preserve nonstick cookware during a cooking event that involves high heat.
Sandwich makers cannot be cleaned in the dishwasher. As water will enter the electrical system, this will likely result in the machine’s destruction. If your sandwich maker has detachable plates, you may be able to wash them in the dishwasher, but this varies by model. Check the sandwich maker’s manual to determine if the plates can be removed from the machine and if they are dishwasher safe.
Conclusion
Cleaning your toaster after every use is a worthwhile activity because it will prolong the life of your appliance for many years! By following our simple 4-step cleaning procedure, you can ensure that your sandwich maker is thoroughly cleaned. Check out our other blog posts for additional helpful advice.
Related Posts

What is the best sandwich maker with removable plates?
Disclaimer: There are affiliate links in this post. At no...
Read More
Ovente Electric Sandwich Maker Reviews
Disclaimer: There are affiliate links in this post. At no...
Read More
Is BLACK+DECKER WM2000SD Sandwich Maker worth it?
Disclaimer: There are affiliate links in this post. At no...
Read MoreWhy Trust Us
You will find what you are looking for at dulceriabakery. From classic to luxury brands, you'll find both. We will help you to select appliances that fit your needs, budget and lifestyle. Whether you want to stop by to learn more — or plan to make a major purchase — we’ll treat you like family and assist you every step of the way. Shop with us today to receive friendly and experienced help along the way.