
Panini sandwiches are foods that appear fancy and complicated to make but are one of the simplest snacks and meals you can prepare. If you already know how to make a grilled cheese sandwich, you are ready to move on to paninis. Only knowledge of how to use a panini press is required.
In this article, I will describe how to use a panini press. Believe me; it’s straightforward. In addition, I will leave you with some suggestions so that you can let your imagination run wild and create even more items with your panini press.
Step 1: Plug In Your Panini Press
First, ensure that your panini press is thoroughly clean. Using a clean dishcloth to wipe it down will do the trick.
Then, plug it into an outlet for it to begin functioning. Depending on your model, you may be required to adjust the temperature of your cooking plates. If this is the case, choose any medium-high temperature your model supports. It should be around 350 degrees Fahrenheit.
Step 2: Apply Oil To The Griddles
The second step is to apply oil to the panini press’s cooking surface. I find that this prevents food from sticking to plates or burning. If your model has nonstick plates, this step is entirely up to you. However, you will likely find that the added oil browns your panini sandwich to perfection.
If you choose to follow this step, you can pour olive oil onto a paper towel or reusable towel and wipe the top and bottom griddles. A less messy alternative is to spray cooking spray on the griddles.
Step 3: Let Preheat
Then, you should close the panini press’s lid and allow the cooking plates to heat. This will result in crispier bread, contrasting nicely with the warm and soft fillings.
Most contemporary panini presses have an indicator light that turns green when the plates are sufficiently heated.
It is acceptable if yours does not have this indicator light. It should take between five and seven minutes to heat the griddles. You can also sprinkle a few drops on the plates; if the water quickly turns to steam, you can begin cooking.
Step 4: Assemble The Panini
Now comes the enjoyable part: constructing your panini. Utilize the time it takes for your panini maker to heat up to begin gathering the ingredients and preparing the sandwich.
Select your preferred sandwich bread first. Then, choose your protein, vegetables, seasoning, and sauce. The possibilities here are truly limitless. You can try any flavor combination you can imagine (and I bet it will be delicious). Remember to place any moist ingredients (such as tomato) in the middle layers of the sandwich so that the moisture does not saturate the bread.
Two slices of sourdough bread could be topped with two pieces of chicken breast, tomato slices, and thick slices of fresh mozzarella cheese. If you want to make this sandwich even more delicious, add a dollop of pesto to it. Panini with grilled cheese and chicken, anyone?
ADVICE FROM THE EXPERTS: DO NOT OVERFILL IT!
However, please do not overfill your sandwich. The fillings will likely leak and create a tremendous mess if you do so.
Step 5: Let Cook
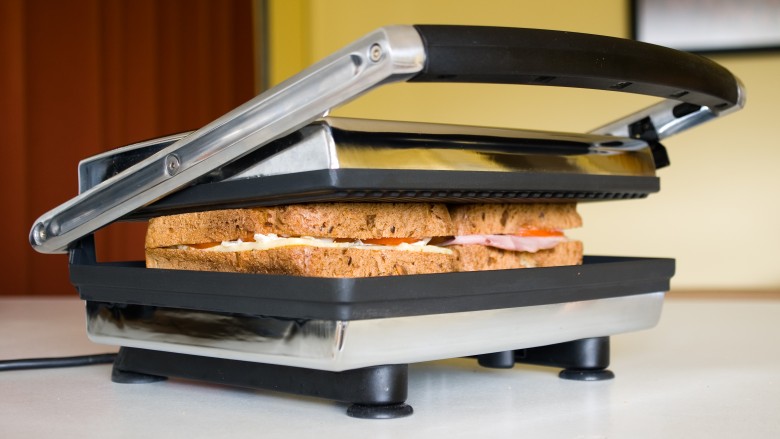
Close the lid once your panini is placed on the cooking griddles. Ensure that you are applying pressure to the sandwich; it is a panini press.
Most panini presses include a clasp for closing the lid. This will result in grill marks on both slices of bread.
The cooking time for your panini should be between five and seven minutes. Periodically, you can check on the progress. Ideally, the bread will be evenly toasted, and the cheese, if any, will have melted.
Step 6: Plate Up!
When you believe your sandwich to be complete, unplug the panini press. Then, remove the food from the grill using a plastic spatula. You mustn’t use metal utensils to remove your sandwich from the panini maker, especially if it is nonstick. Scratching the metal can peel off the nonstick coating, destroying the appliance.
Step 7: Clean
The final step is cleaning! The good news is that panini presses are simple to clean if you know what you’re doing. Fortunately, we already have a detailed article on cleaning a panini presses thoroughly.
Tips On Using A Panini Press
Follow these simple tips for panini success from assembly to cooking.
- Begin with the excellent bread. We advise using a bread that can withstand heat. Italian bread such as focaccia, ciabatta, and baguettes are typically more robust than sourdough, and they grill better.
- Bring the heat. Before placing your panini on the grill, ensure that it is extremely hot; this will produce better grill marks.
- For maximum crunch. Brush melted butter or olive oil onto the bread’s exterior, and if you’re using “wet” ingredients such as tomatoes, layer them in the middle of the sandwich with meats and cheeses on either side so they don’t drown the bread.
- Keep the goods contained. Even though you’ll want to keep the fillings to a minimum if you’re concerned about things spilling out during grilling — especially if there’s a substantial amount of cheese inside — wrap your panini in parchment paper before placing it on the grill.
- No panini press. No problem! You can grill one side at a time if you have a grill on your stovetop. Imitate a traditional sandwich press by placing something heavy on the panini, such as a stack of plates or a heavy pan. Even without grill marks, the meal will still be delicious if prepared on an outdoor grill or in a frying pan. Another fantastic method for making panini without a press. Employ a waffle maker! Place the sandwich in the waffle maker, close the lid, and press down on it with a heavy skillet.
The Ultimate Guide To Making Perfect Panini Every Time: Tips And Tricks.
You can use your panini press for more than just making sandwiches. There are many additional activities you can (and should!) try.
Grill Bacon
Let’s begin with an audience-pleaser. A panini press facilitates the grilling of bacon. Follow the first three steps of our guide on using a panini press, and then place the bacon slices on the griddle. Close the lid and allow three to five minutes of cooking time. Unplug the panini grill when the pieces have reached your desired “doneness.”
Toast Bread
Did you know that toasting bread without a toaster is possible? Don’t worry if you’re a college student living in a dorm without a reliable toaster. Warm-up your panini press, place the bread slices on the griddles, and allow them to toast for five to seven minutes.
Make Hashbrowns
Hash browns are among the most popular breakfast foods, and simple kitchen appliances are sufficient to prepare them. They can be made with both a waffle iron and a panini press. Pour the “batter” of shredded potatoes, butter, and seasonings onto the griddle, close the lid, and cook for seven to ten minutes.
Grill Veggies
A panini press can help fill the void left in your heart during grilling season. Place sliced bell peppers, onions, and asparagus on a panini press’s oiled and preheated grill plates. Then, close the grill’s lid to produce grill marks. Three to seven minutes of cooking, and you’re done!
Make Quesadillas
Lastly, you can also make a quesadilla using a panini press! A panini press will suffice even though a quesadilla maker (another straightforward kitchen appliance) is typically required. Layer on freshly shredded cheese, cook until the cheese is completely melted, and enjoy.
How To Use A Panini Press - FAQs
After assembling the sandwich, brush or spray each side with butter, canola oil, or olive oil. Cover the sandwich with the grill press after placing it on the press. Each side of the panini should cook for at least three to four minutes or up to five until it turns golden brown.
To add crunchiness, spread butter on the Panini press before placing the bread. This will ensure a crisp grilling experience.
The cooking time for your panini should be between five and seven minutes. Periodically, you can check on the progress. Ideally, the bread will be evenly toasted, and the cheese, if any, will have melted.
When preparing a sandwich, any type of bread can be used, but this is not the case for panini. Creating a panini requires heat and pressure, so the bread you use must be able to withstand these conditions.
When biting into a great panini, the crispy crunch of the bread is a defining characteristic. Before toasting, brush the exterior with olive oil or butter to ensure you obtain the desired crunch. This will help the bread to brown and harden for a delicious bite.
We featured an excellent tip for making hot sandwiches in a panini press without messing. Before placing your sandwiches in the press, wrap them in parchment paper; this will create a little envelope for messy cheeses and oils and keep them off the machine.
We advise using a bread that can withstand heat. Italian bread such as focaccia, ciabatta, and baguettes are typically more robust than sourdough, and they grill better.
Which cheese is best for paninis? Panini cheeses include goat cheese, parmesan, gruyere, cheddar, Monterey Jack, and mozzarella. These panini sandwiches are simple to make and packed with flavor; you’re sure to find something you like in this collection of panini recipes.
Warning: Don’t Get Overly Ambitious
Before I conclude this post, a few words of caution: don’t get too creative and grill everything. Technically, a panini press could replace an electric countertop griddle, but prolonged use may cause it to malfunction.
Verify that the internal temperature of fish fillets, chicken breasts, and other proteins has reached a safe level before consuming. Otherwise, if the center is undercooked, you could get food poisoning.
Related Posts

What is the best sandwich maker with removable plates?
Disclaimer: There are affiliate links in this post. At no...
Read More
Ovente Electric Sandwich Maker Reviews
Disclaimer: There are affiliate links in this post. At no...
Read More
Is BLACK+DECKER WM2000SD Sandwich Maker worth it?
Disclaimer: There are affiliate links in this post. At no...
Read MoreWhy Trust Us
You will find what you are looking for at dulceriabakery. From classic to luxury brands, you'll find both. We will help you to select appliances that fit your needs, budget and lifestyle. Whether you want to stop by to learn more — or plan to make a major purchase — we’ll treat you like family and assist you every step of the way. Shop with us today to receive friendly and experienced help along the way.